GST • Income Tax • Registration • Payroll • Advisory • FSSAI • Virtual CFO

How to File GST Return Online: Step-by-Step Guide (2026)

Filing your first GST return can feel confusing and overwhelming at the same time. There are different forms, different dates, and a portal that doesn’t always explain itself. This guide walks you through how to file a GST return online, one step at a time, from logging in to getting your acknowledgement number.

Quick answer: To file a GST return online, log in to the GST portal, file GSTR-1 for your sales, then file GSTR-3B to report your tax and pay it. Verify with an EVC or DSC, and save the ARN as proof. Monthly filers do this every month, and quarterly filers do it every quarter.

What You Need Before You Start Filing GST Return

Having everything ready makes filing much faster. Keep these at hand:

For GSTR-1 (sales)For GSTR-3B (tax summary)
Sales invoices (B2B and B2C)GSTR-2B for the period (your ITC statement)
Credit and debit notesPurchase and expense records
Export invoices, if anyDetails of tax already paid or carried forward
HSN or SAC codes for your itemsBank or net banking access for payment
Advance receipts, if anyInterest or late fee details, if you’re late

You also need your GST portal username and password, and a way to verify the return: a mobile number linked to your GST account (for EVC), or a Digital Signature Certificate (DSC).

GSTR-1 and GSTR-3B: Which One First?

  • GSTR-1 reports your sales (outward supplies).
  • GSTR-3B is a summary return: your sales, the Input Tax Credit (ITC) you claim, and the tax you pay.

File GSTR-1 first. Your GSTR-3B then fills in your sales figures from it, so you only need to check them. For the dates of each return, see our GST return filing dates guide.

How to File GSTR-1 Online (Step by Step)

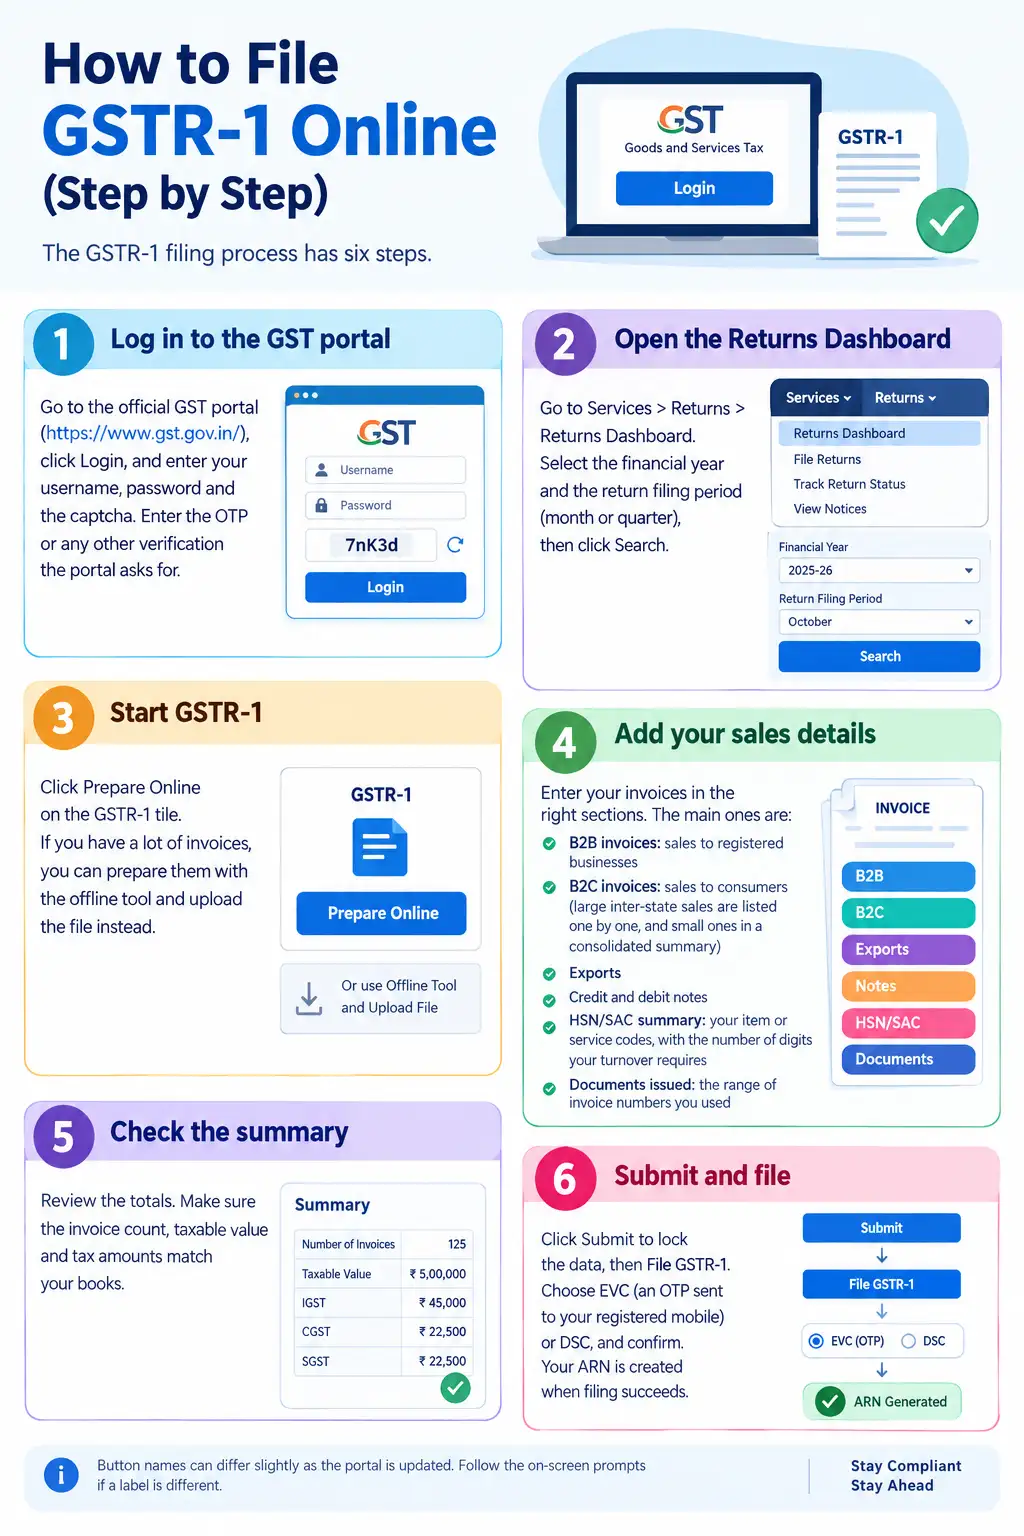
An instructional infographic detailing how to file GST return online, showing the 6 step-by-step procedures to fill and file GSTR-1 on the official government GST portal.

The GSTR-1 filing process has six steps.

Step 1: Log in to the GST portal

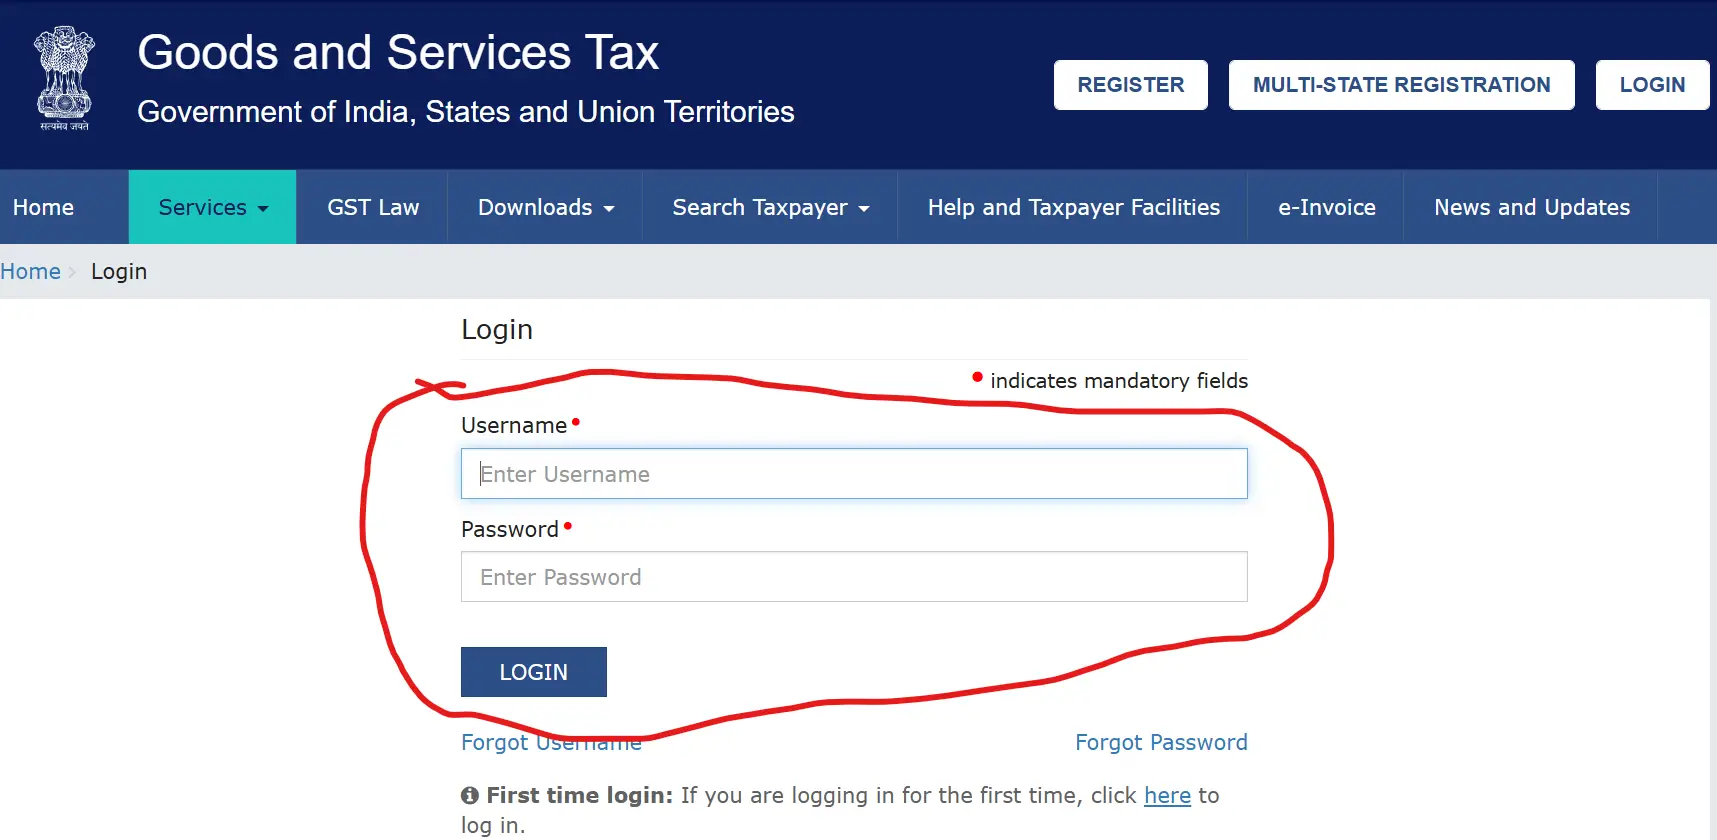
Go to the official GST portal, click Login, and enter your username, password and the captcha. Enter the OTP or any other verification the portal asks for.

GST portal login for filing gst return online

Step 2: Open the Returns Dashboard

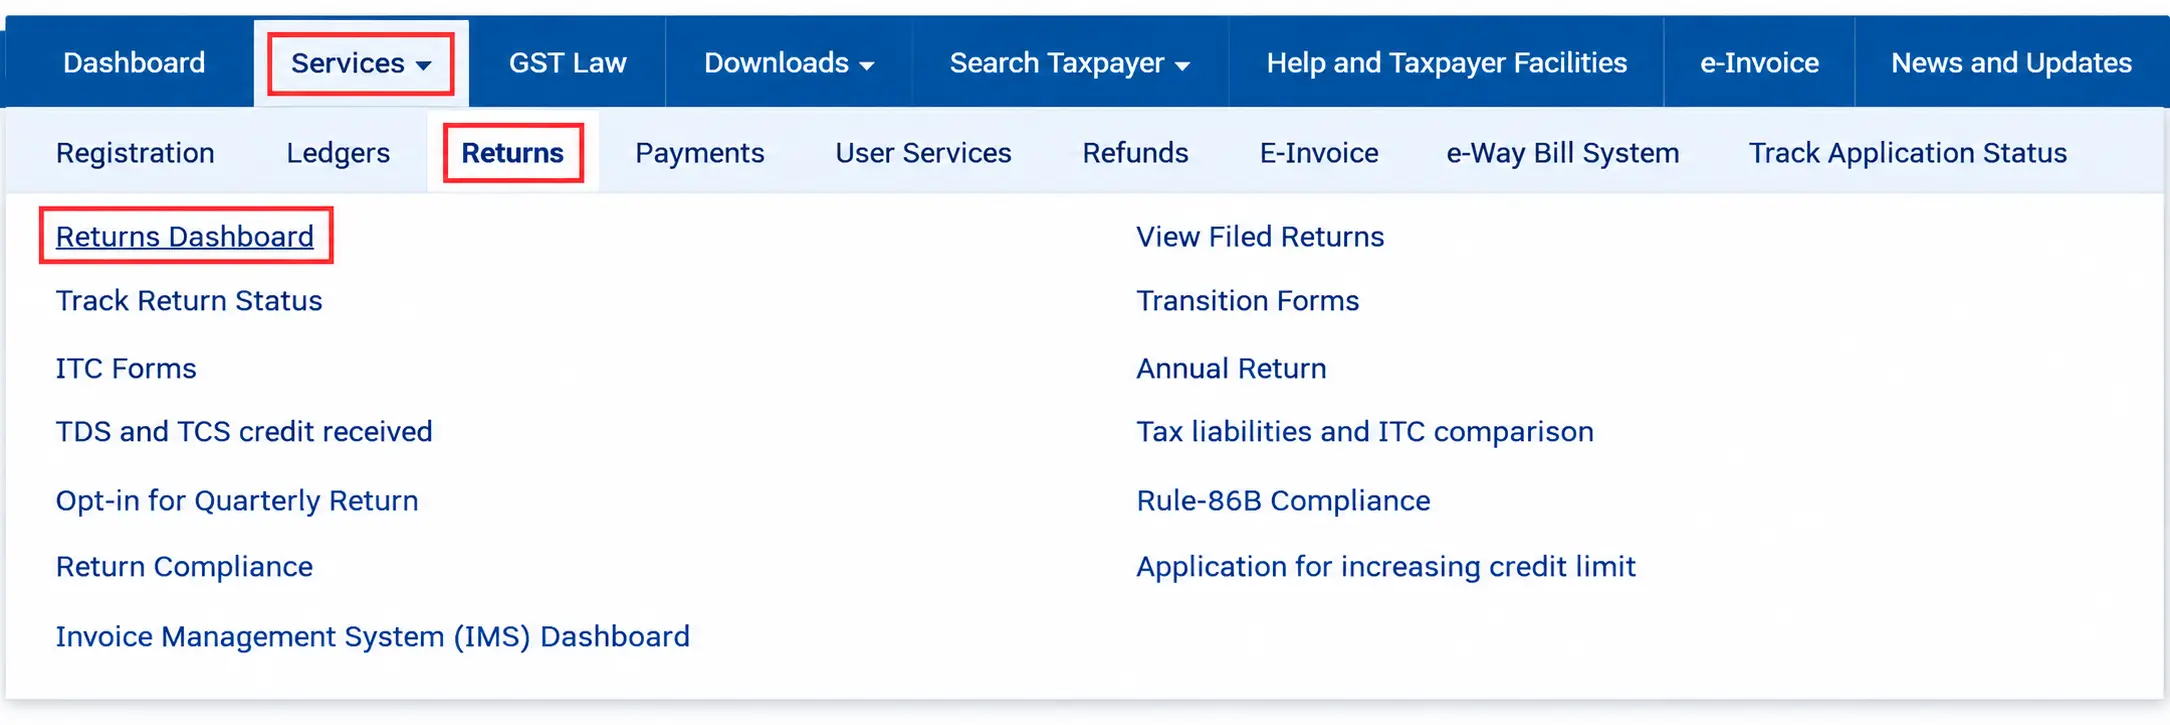
Go to Services > Returns > Returns Dashboard. Select the financial year and the return filing period (the month or quarter), then click Search.

GST portal Returns Dashboard menu showing the navigation path Services > Returns > Returns Dashboard for accessing GST return filing services.

Source: Official GST Portal, Government of India – GST Portal.

Step 3: Start GSTR-1

Click Prepare Online on the GSTR-1 tile. If you have a lot of invoices, you can prepare them with the offline tool and upload the file instead.

Step 4: Add your sales details

Enter your invoices in the right sections. The main ones are:

  • B2B invoices: sales to registered businesses
  • B2C invoices: sales to consumers (large inter-state sales are listed one by one, and small ones in a consolidated summary)
  • Exports
  • Credit and debit notes
  • HSN/SAC summary: your item or service codes, with the number of digits your turnover requires
  • Documents issued: the range of invoice numbers you used

Step 5: Check the summary

Review the totals. Make sure the invoice count, taxable value and tax amounts match your books.

Step 6: Submit and file

Click Submit to lock the data, then File GSTR-1. Choose EVC (an OTP sent to your registered mobile) or DSC, and confirm. Your ARN is created when filing succeeds.

Button names can differ slightly as the portal is updated. Follow the on-screen prompts if a label is different.

How to File GSTR-3B Online (Step by Step)

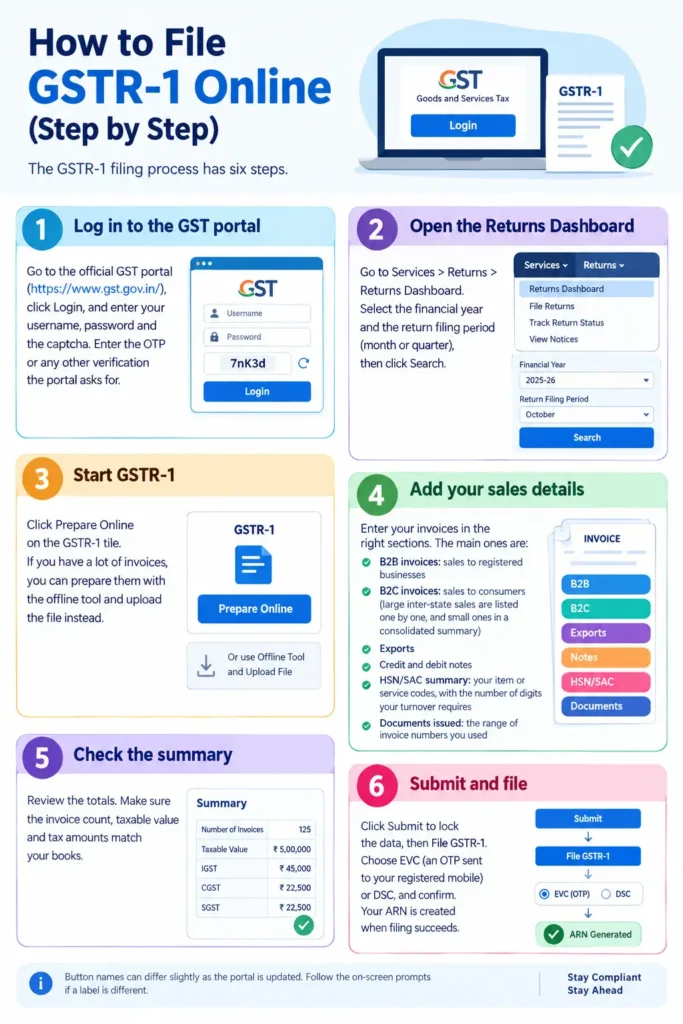
An instructional infographic detailing how to file GST return online, showing the 6 step-by-step procedures to fill and file GSTR-1 on the official government GST portal.


Step 1: Open GSTR-3B

On the same Returns Dashboard, with the same period selected, click Prepare Online on the GSTR-3B tile.

Step 2: Check your sales figures

The outward supplies section is auto-filled from your GSTR-1. Check them. If something doesn’t look right, fix the cause in your GSTR-1 data where you can, rather than overwriting numbers without a reason.

Step 3: Match your ITC with GSTR-2B

Download your GSTR-2B for the period (it’s available after the 14th of the next month). Claim only the ITC that appears in it and that you’re eligible for. Mismatched ITC is the most common reason for notices.

Step 4: Add interest or late fee, if any

If you’re filing late, add the interest and late fee in the section provided. The portal shows the amounts. These must be paid in cash.

Step 5: Pay your tax

The portal shows your net tax payable after ITC. Pay it before you file:

  1. Go to Services > Payments > Create Challan and pay by net banking, NEFT/RTGS or over the counter. The amount goes to your cash ledger.
  2. Back in GSTR-3B, click Make Payment / Offset Liability to adjust the tax from your cash and credit ledgers.

Pay a day or two early if you’re using NEFT or RTGS, since the amount takes time to show in your ledger.

Step 6: Submit and file

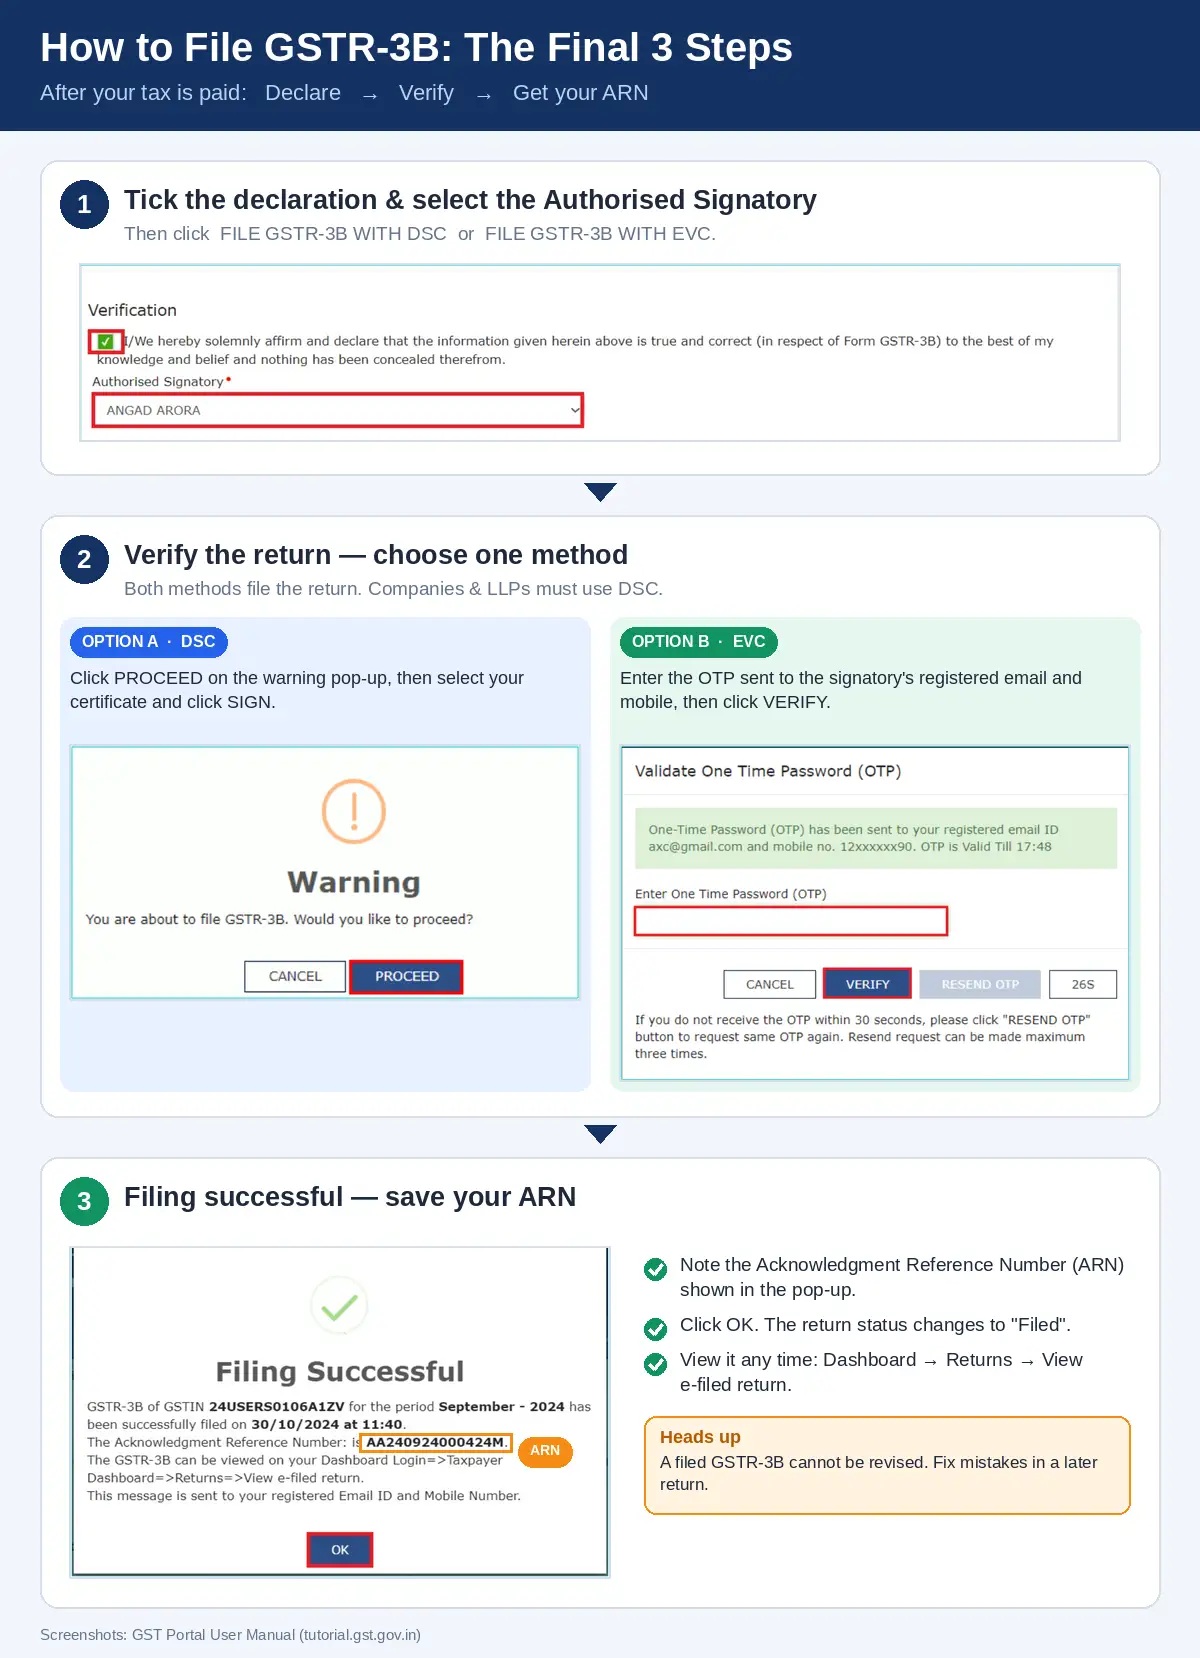
Preview the return, tick the declaration, click Submit, and then File GSTR-3B with EVC or DSC. Download the filed return and save the ARN.

GSTR-3B filing steps: tick the declaration, verify with DSC or EVC, and save the ARN after filing.

A filed GSTR-3B can’t be revised. If you find a mistake after filing, you correct it in a later return, so check carefully before you submit.

Who Needs a DSC or EVC?

  • Companies and LLPs must verify returns with a DSC.
  • Most other taxpayers can use an EVC (an OTP to the mobile number registered on the GST portal).

How to File GST Returns If You’re a Quarterly (QRMP) Filer

Under the QRMP scheme, you file GSTR-1 and GSTR-3B once a quarter, but you still pay tax every month using a payment challan (PMT-06) for the first two months. The steps are the same as above. Only the return period changes to the quarter.

Filing a Nil GST Return

If you had no sales and no purchases in the period, you still need to file a nil return. It’s quicker than a regular return and can often be done with a simple confirmation, even by SMS. See our guide to how to file a nil GST return for the exact steps.

After You File: Check That It Worked

  1. Download the filed return and note the ARN.
  2. Go to Services > Returns > Track Return Status and enter the ARN or the period to confirm the status shows as filed.
  3. Keep the ARN and the filed return PDF with your records.

Common Mistakes to Avoid During Filing GST Return

MistakeWhat to do
Choosing the wrong periodCheck the month or quarter before you start
Leaving out invoicesReconcile with your sales register before filing
Claiming ITC that isn’t in GSTR-2BClaim only what is eligible and matches
Paying tax but not filingPayment alone is not filing. Always submit and file the return
Filing a nil return when you had salesCheck your books for the period first
Filing late

Late fees and 18% yearly interest apply. See the late fee guide

Should You File Yourself or Hire a Professional?

Filing on your own works well when you have a small number of invoices and a clear record of your purchases. It gets harder with high invoice volumes, several GST registrations, or ITC that needs matching. Mistakes can cost you notices, blocked credit and late fees.

If you’d rather not handle it yourself, our GST return filing services cover preparation, reconciliation and filing, with the ARN shared once it’s done.

FAQs

Log in to the GST portal, open the Returns Dashboard, file GSTR-1 for your sales, then GSTR-3B to report your tax and pay it. Verify each return with an EVC or DSC. Make sure you have your GST login details and invoice records ready first.

File GSTR-1 first. It reports your sales, and GSTR-3B picks up those figures automatically, which saves effort and reduces errors.

You can prepare the data offline using the portal’s offline tool and upload it, but the return itself is always filed online on the GST portal.

Yes, in most cases you can verify with an EVC sent to your registered mobile number. Companies and LLPs must use a DSC.

A small, well-organised business can often finish in under an hour. If you have many invoices or ITC to match, it can take much longer.

A filed GSTR-3B can’t be revised. Correct the error in a later return, such as through the amendments section of GSTR-1 or the next GSTR-3B. Get professional help if the amount is large.

Log in, go to Services > Returns > Track Return Status, and search by period or ARN.

Yes. Registered taxpayers generally need to file a nil return even when there was no business activity.

Need Help Filing Your GST Returns?

Missing dates, mismatched ITC and last-minute errors cost businesses time and money. Our experts file your GSTR-1 and GSTR-3B for you. Share your details to get a free consultation with a CoTaxo expert.

Submit your Details to get an Instant All-inclusive Quote and a FREE Expert consultation

Call Us WhatsApp